This is a basic tutorial to help you develop a texture map for an object. This is only one way to do it and not necessarily the best. It does provide a relatively accurate texture map without needing advanced texturing/3d modeling skills. You must start with an accurate diagram of your model in all needed isometric views. Buildings and some rollingstock is the best to do this with since most of the sides are flat. Steam locos are much more difficult and require different techniques.
One thing that I must mention when using this technique is that you will be ‘wrapping’ large amounts of texture over the object which will cause it to stretch and lose some resolution. Many of the Auran supplied objects are done this way and some of them appear “fuzzy”. If you need high detail then this technique will not work unless the total texture map size is very large. So, use with caution or use another method.
NOTE: You must have an understanding of the Auran Content Creation Guide and your selected photo editing program.
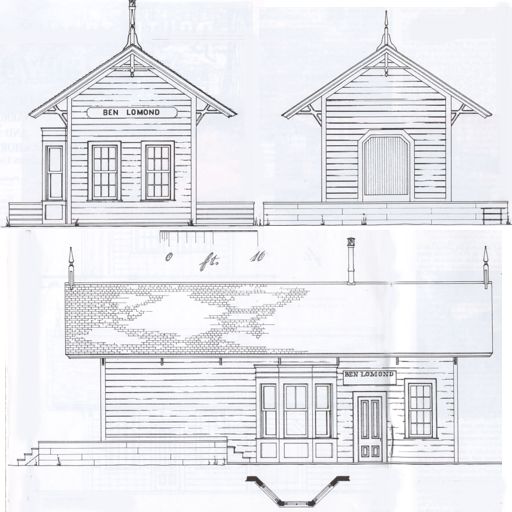
Start out with a scanned diagram that is properly sized for Trainz texture export, (i.e. 256x256, 512x512 etc). The pixel size must be a product of 8. This one does not utilize extra space very well but it will do for an example. You can use your photo editor to cut and paste the original diagram parts to fit everything within the texture map.
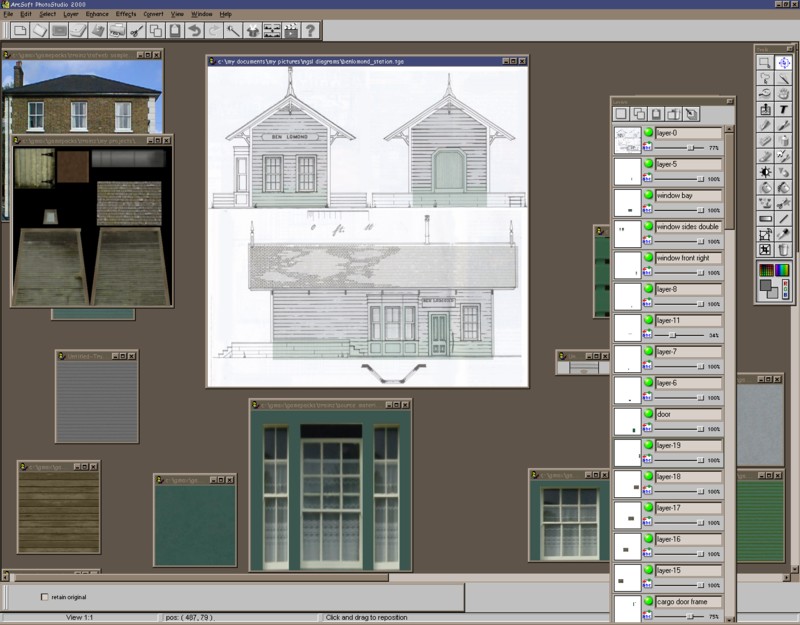
Open the diagram in your favorite photo editor. You must be using one that has a “layers” function in order to manipulate the various areas of the map while still being able to see the original diagram. In this case I have opened up many other texture samples that I will use to build up my texture map. I simply copy and paste the textures into the main map and using the transparency features, adjust the sizes as needed.

Here we see the different textures that are used to make the main texture map. The selected textures are layered onto the drawing. There will be a bit of nip and tuck during this process to line everything up with the original drawing.
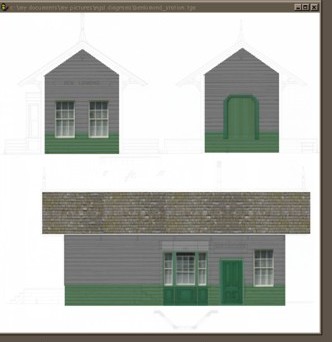
Here is a rough map, it wastes a lot of space so some re-arranging can be done to make the texture size smaller and compact.
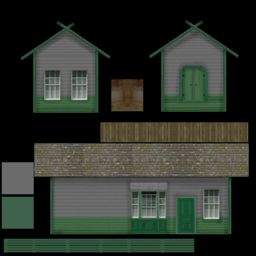
Here is an enlarged map that was used in Trainz. It is 256x256. Notice that I added some forced “shadowing” to the texture to enhance it’s look. Many things like dirt and weathering or signs can be done at this point. Extra small textures for other items can be added as needed to the main texture map.
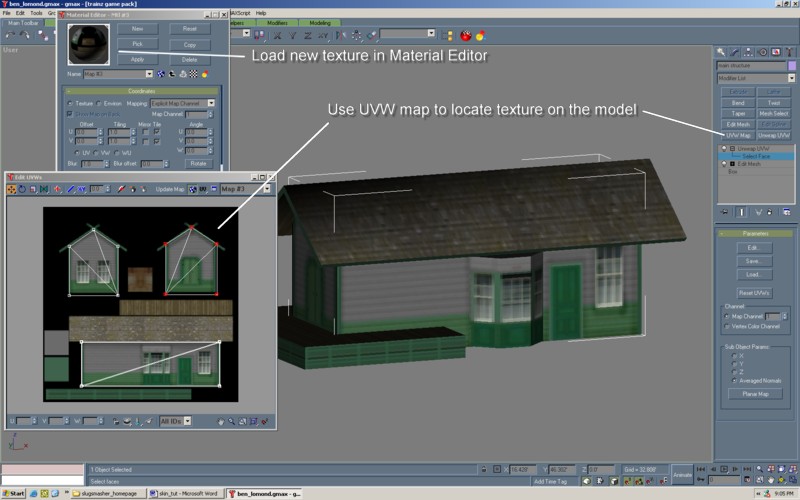
Now you must go into Gmax or 3dsMax and build the model. You can use the diagram as a template or do it from scratch. I simply made the model from the measurements off the original diagram. Using the UVW map option, you then simply apply the texture to the finished model as shown. This is a very basic example but it does illustrate what is possible with more complicated objects using this simple technique.
You can download this model and texture